This guide demonstrates how you could use Time Travel to address a common development scenario: debugging issues following a CI/CD deployment to production.
In this scenario, your team has recently introduced a streamlined checkout process, managed by a new_checkout_process feature flag. Soon after this flag was enabled, customer support started receiving complaints related to the new feature. As a developer, you're tasked with investigating the issues to confirm whether they are directly linked to the feature's activation.
Before You Start
To follow this tutorial, you'll need:
- A Neon account. Sign up here.
- A restore window that covers the timeframe of interest, allowing for effective use of Time Travel.
Preparing Your Database
To simulate this scenario, create a
feature_flagstable used for controlling new feature availability.-
Create
project_dbDatabase:In the Neon Console, create a new database named
project_db. -
Initialize
feature_flagsTable:Execute the following in the SQL Editor, with
product_dbselected as the database:CREATE TABLE feature_flags ( feature_name TEXT PRIMARY KEY, enabled BOOLEAN NOT NULL ); -
Insert Sample Data:
Populate the table with an initial feature flag:
INSERT INTO feature_flags (feature_name, enabled)
VALUES ('new_checkout_process', FALSE);
This setup reflects a typical development stage: the feature is integrated and deployment-ready but remains inactive, awaiting activation.
-
Simulating Feature Flag Activation
Now, we'll simulate the process of enabling this feature flag to release the feature.
Enable the Feature Flag
Execute the following SQL command in the SQL Editor to simulate activating the feature by changing the feature flag's status to
TRUE.UPDATE feature_flags SET enabled = TRUE WHERE feature_name = 'new_checkout_process';This action mirrors enabling a new feature in your production environment, typically managed as part of your CI/CD pipeline.
Determine exactly when the feature was enabled
Since user complaints started coming in right after the feature was enabled, our first debug step is to confirm the exact moment the
new_checkout_processfeature flag was activated. Assume we've checked the deployment logs or CI/CD pipeline history and found the activation timestamp to be2023-04-09 at 6:11 PM EST.For this tutorial, locate the timestamp of the
UPDATEoperation in the History tab of the SQL Editor: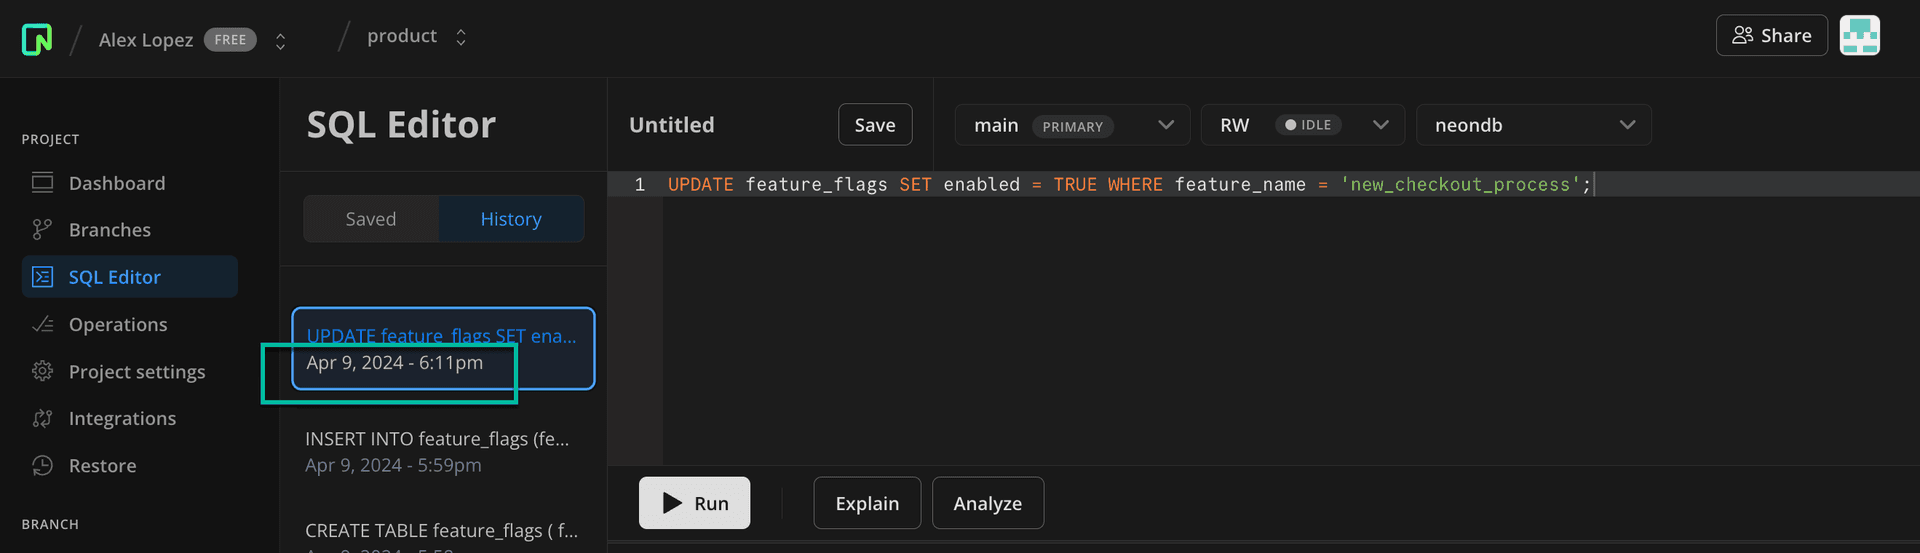
note
Timestamps in the Neon Console are shown in your local timezone. The time in this screenshot converts from
2023-04-09 at 6:11:00:00 PM ESTto2023-04-09 at 10:11:00 PM UTC.Verifying Feature Flag Pre-Activation Status
Let's confirm that the feature was indeed disabled just before the feature flag's activation.
-
Enable the Time Travel toggle in the SQL Editor.
-
Enter a time period just before the identified activation timestamp.
For our purposes, we'll select
2023-04-09 at 18:10 PM EST, which is one minute before our activation time.SELECT * FROM feature_flags WHERE feature_name = 'new_checkout_process';We'll see the feature flag shows as
ffor false, as expected.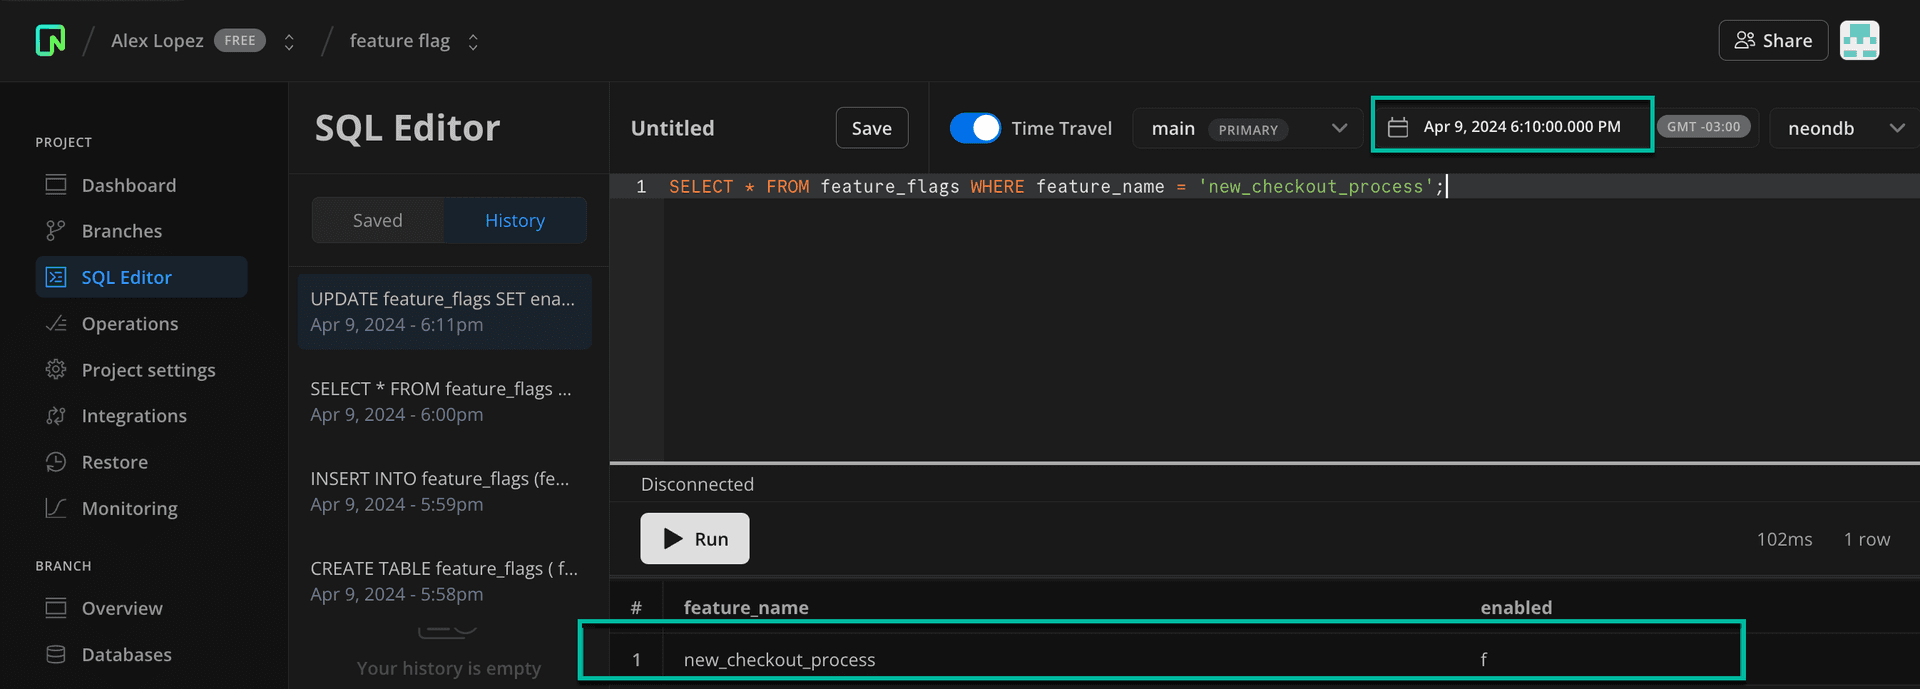
-
Analyzing Post-Activation State
With the pre-activation state confirmed, now check the feature flag's status immediately after activation.
Adjust Time Selector to Post-Activation:
Move to a time just after the feature's activation. For example, one minute after the timestamp copied from Step 2, so
2023-04-09 at 6:12 PM EST. Re-execute the query.SELECT * FROM feature_flags WHERE feature_name = 'new_checkout_process';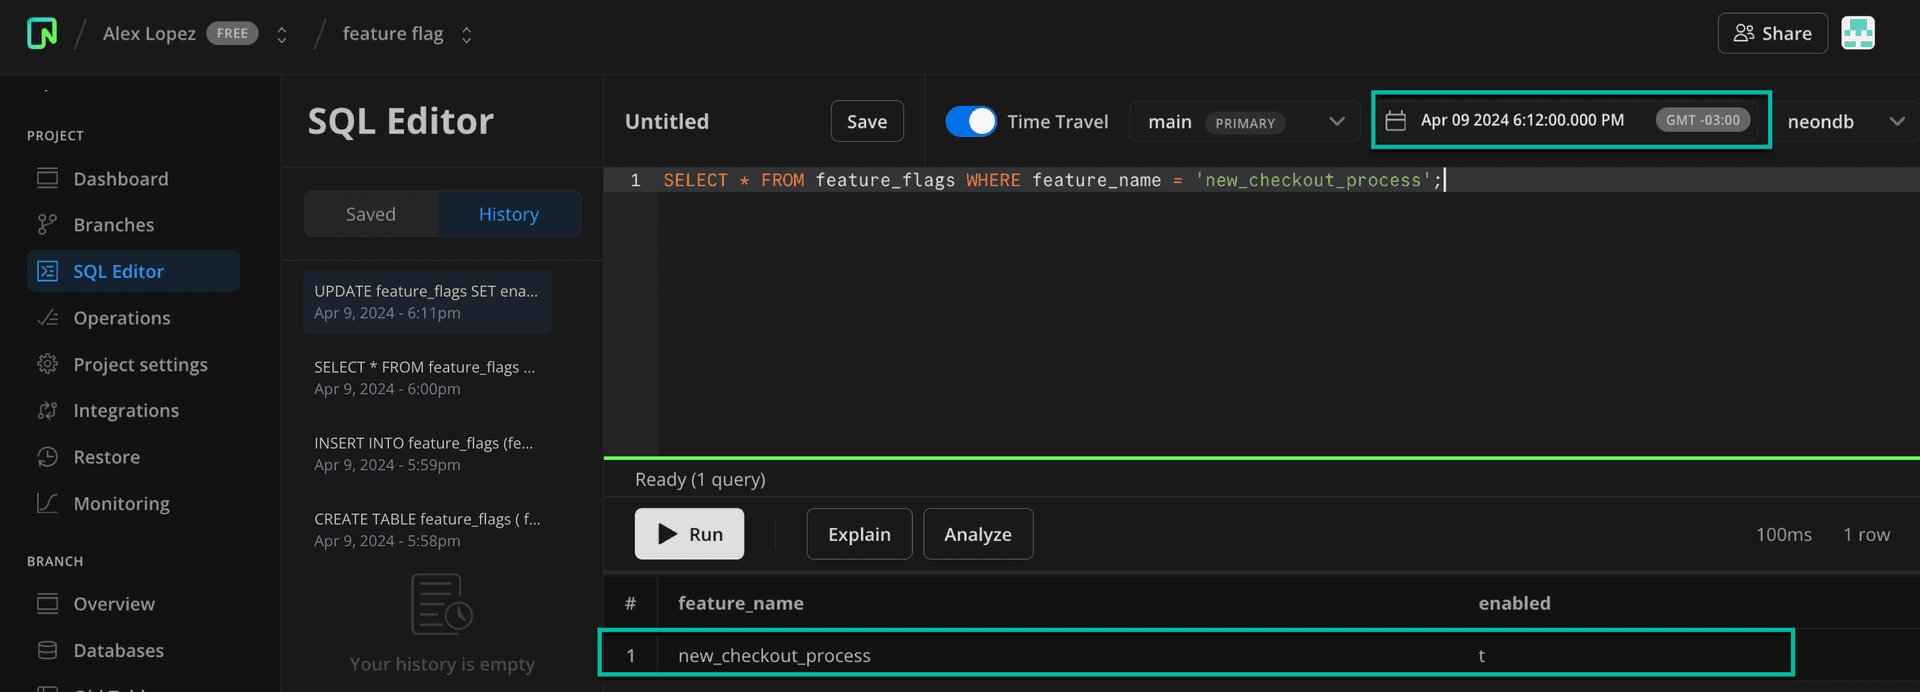
Now, we see the
new_checkout_processfeature flag istfor true, confirming that enabling the feature caused the reported issues. With this confirmation we can move on to our follow-up actions: fix the problem, turn off the feature flag, update stakeholders, or engage in a feedback loop with users to refine the feature based on real-world usage.